Cart
0

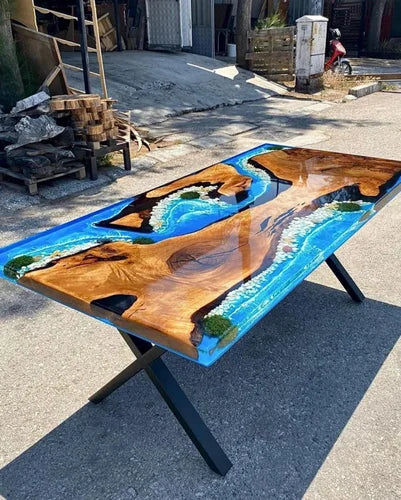
A colorful resin table is a stunning addition to any home or workspace, offering a blend of artistry and functionality. Whether you’re a DIY enthusiast or an experienced craftsman, creating a vibrant resin table can be a fulfilling project. Follow this step-by-step guide to make your own colorful resin table.
Materials Needed:
-
Epoxy resin and hardener
-
Wood slab or MDF board
-
Pigments or alcohol inks (various colors)
-
Mixing cups and stirring sticks
-
Heat gun or torch
-
Sandpaper (various grits)
-
Protective gloves and mask
-
Painter’s tape
-
Measuring scale
-
Polyurethane or resin sealant
Step-by-Step Process:
1. Prepare the Base
Start by selecting a wooden slab or MDF board. Sand the surface to remove any rough edges and dust. Ensure the surface is level, clean, and dry.
2. Create a Mold (if necessary)
If you’re making a river table or want defined edges, use painter’s tape or a silicone mold to create a boundary for the resin. This will prevent the resin from spilling over the sides.
3. Mix the Resin
Carefully measure and mix the epoxy resin and hardener according to the manufacturer’s instructions. Stir slowly to avoid air bubbles.
4. Add Colors
Divide the resin into separate mixing cups and add different pigments or alcohol inks to each batch. Stir well to achieve the desired shades.
5. Pour the Resin
Start by pouring the colored resin onto the table surface. You can swirl colors together for a marbled effect or create a structured design. Use a heat gun or torch to remove air bubbles.
6. Cure the Resin
Allow the resin to cure for the recommended time (typically 24-48 hours). Keep the table in a dust-free environment to ensure a smooth finish.
7. Sand and Finish
Once cured, sand the surface using fine-grit sandpaper to achieve a glass-like finish. Apply a protective polyurethane coat or an additional resin layer for durability and shine.
8. Attach Legs (if applicable)
Once the tabletop is ready, attach metal or wooden legs to complete your table. Ensure they are properly aligned and secured.
Final Thoughts
Creating a colorful resin table is a creative process that allows you to experiment with different hues and designs. With patience and the right materials, you can craft a unique and eye-catching piece that enhances your space. Start your resin table project today and bring vibrant art into your home!