Cart
0
Live edge tables are celebrated for their natural beauty and unique character, offering a striking contrast between rustic wood and modern design. Crafting a live edge table can be a rewarding project, allowing you to create a one-of-a-kind piece that becomes the centerpiece of any room. Here’s a detailed guide on how to make your own unique live edge table.
1. Planning and Design
a. Define Your Vision
Begin by envisioning what you want your live edge table to look like. Consider the table’s purpose—whether it’s a dining table, coffee table, or desk—and how it will fit into your space. Sketch your design, including dimensions, wood type, and any additional elements you want to incorporate.
b. Select the Wood
Choose a live edge slab that matches your vision. Popular choices include walnut, oak, and maple. Each type of wood has its own characteristics and color variations. Look for a slab with an interesting live edge and minimal defects. If sourcing locally, visit lumberyards or specialty wood suppliers.
2. Preparing the Wood
a. Inspect and Dry the Wood
Before starting, inspect the wood slab for defects such as cracks or knots. Ensure the wood is properly dried to prevent warping or cracking later. If the slab is freshly cut, you may need to let it air-dry or use a kiln-drying process.
b. Flatten and Sand
Use a planer to flatten the wood slab if necessary. Sand the surface with progressively finer grits, starting from coarse (80-grit) to fine (220-grit). This process removes any rough spots and prepares the wood for finishing.
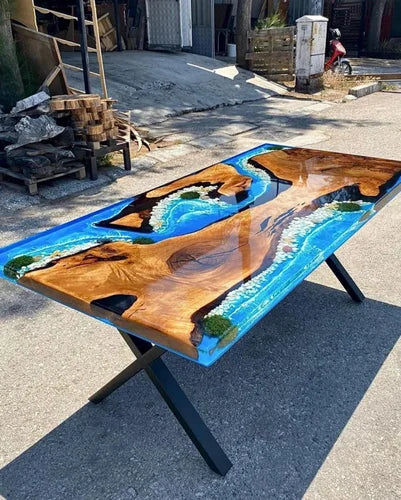
3. Designing the Resin Inlay
a. Choose Your Resin
Select a high-quality epoxy resin suitable for furniture. Clear resin highlights the natural wood grain, while colored or metallic resins can add dramatic effects. You might also incorporate materials like stones, shells, or metal flakes for added uniqueness.
b. Prepare the Mold
If you plan to use resin, create a mold to contain the resin while it cures. You can use silicone molds or build custom molds from plywood. Ensure the mold is well-sealed to prevent leaks.
c. Mix and Pour Resin
Follow the manufacturer's instructions to mix the resin and hardener. Pour the resin into the mold, filling the gaps and creating your desired design. Use tools like stir sticks or heat guns to remove bubbles and ensure a smooth finish.
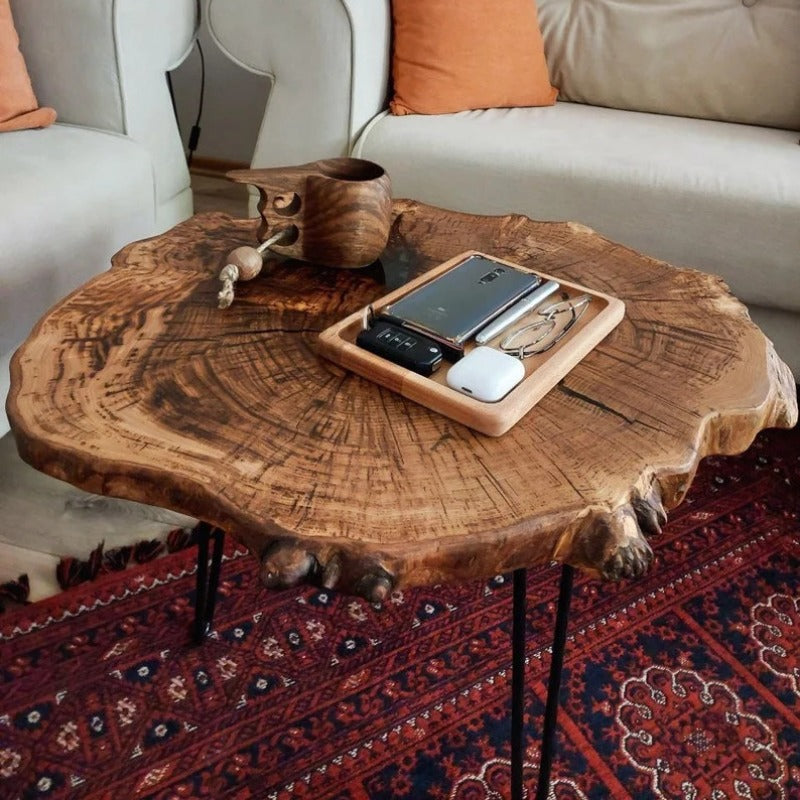
4. Constructing the Table
a. Attach the Legs
Choose table legs or a base that complements your design. You can opt for metal, wood, or even custom designs. Attach the legs securely to the underside of the table slab using appropriate hardware. Ensure the table is stable and level.
b. Apply a Finish
Protect your table with a finish that enhances its beauty and durability. Options include polyurethane, lacquer, or oil. Apply the finish according to the manufacturer’s instructions, and allow it to cure fully between coats. Sand between coats for a smooth, professional finish.
5. Final Assembly and Touches
a. Attach Any Additional Elements
If your design includes features like drawers or additional shelving, install them now. Ensure all components are securely attached and functioning properly.
b. Inspect and Finalize
Carefully inspect your table for any imperfections or areas needing touch-up. Clean the table surface and make any final adjustments to ensure everything is in place.
c. Enjoy Your Creation
Once your live edge table is complete, place it in your desired location and enjoy the beauty of your craftsmanship. It’s a unique piece that reflects both natural artistry and your personal touch.
Conclusion
Making a live edge table is a fulfilling project that combines woodworking skills with creativity. By carefully selecting materials, preparing your wood, and executing your design with precision, you can create a stunning piece of furniture that enhances any space. Embrace the natural imperfections and unique features of live edge wood, and let your table become a conversation piece in your home.