Cart
0
Creating a live edge table is a fantastic way to bring a touch of nature into your home. These unique pieces showcase the beauty of raw wood, preserving its natural edge while providing a functional surface. Whether you’re an experienced woodworker or a DIY enthusiast, this project can be a rewarding endeavor. Let’s dive into how to make your own live edge table!
Materials Needed
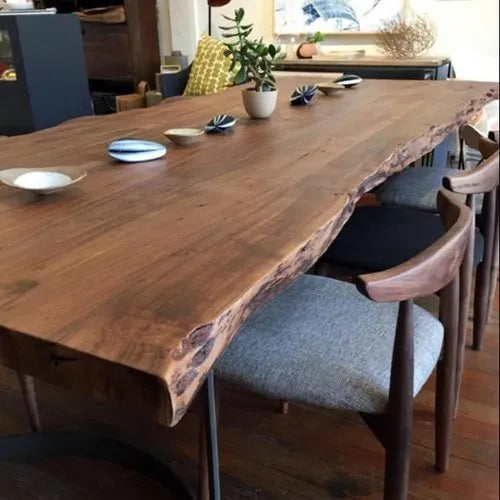
- Wood Slabs: Look for a slab of wood with a natural edge; popular choices include walnut, oak, or cherry.
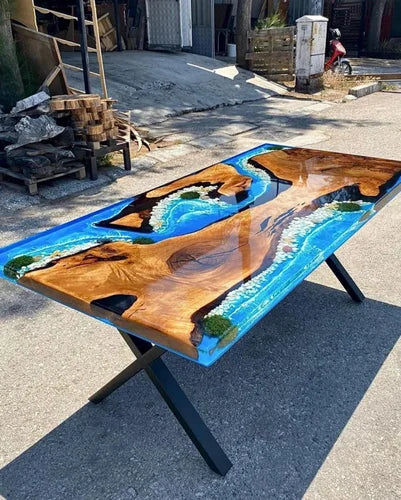
- Wood Finish: Epoxy resin or wood oil (like tung or Danish oil).
- Table Legs: Metal, wood, or hairpin legs (depending on your style).
- Sandpaper: Various grits (80, 120, 220).
- Wood Glue (optional): If you’re joining multiple slabs.
- Tools: Circular saw (if needed), sander, drill, clamps, measuring tape, and a level.
Step 1: Choose Your Wood
Selecting the right wood slab is crucial. Visit a local lumberyard or a specialty wood store to find a slab that resonates with you. Look for interesting grain patterns, natural curves, and unique edges. Keep in mind the dimensions you desire for your table.
Step 2: Prepare the Wood
- Flatten the Surface: Use a planer or a router with a sled to flatten the top of your wood slab, ensuring it’s even.
- Sand the Surface: Start with coarse sandpaper (80 grit) and work your way up to finer grits (220 grit) for a smooth finish. Don’t forget to sand the edges to maintain the natural look.
Step 3: Fill Gaps and Cracks
If your wood slab has any cracks or voids, fill them with epoxy resin. This not only enhances the table’s appearance but also strengthens the wood.
- Mix the Epoxy: Follow the manufacturer's instructions to mix the resin.
- Pour into Gaps: Carefully pour the epoxy into the gaps, ensuring it fills completely.
- Let It Cure: Allow the epoxy to cure as per the instructions (usually 24 hours).
Step 4: Finishing Touches
- Final Sanding: After the epoxy has cured, sand the surface again to ensure everything is smooth and even.
- Apply Finish: Choose between an oil finish for a natural look or a polyurethane finish for more protection. Apply it evenly, following the grain of the wood.
Step 5: Attach the Legs
Decide on your preferred leg style—metal, wooden, or hairpin legs.
- Position the Legs: Center them based on your table size.
- Drill Holes: Drill pilot holes for screws, ensuring you don’t split the wood.
- Attach the Legs: Secure them tightly, checking for stability.
Step 6: Enjoy Your Table!
Once everything is assembled and the finish is dry, your live edge table is ready to be showcased. Place it in your living room, dining area, or any space that could use a touch of natural elegance.
Tips for Success
- Choose Quality Wood: The beauty of a live edge table comes from the wood, so invest in quality.
- Take Your Time: Don’t rush the sanding and finishing process; patience will yield a stunning result.
- Be Creative: Feel free to customize your table with unique legs, additional shelves, or even built-in lighting.
Conclusion
Making a live edge table is more than just a woodworking project; it’s an opportunity to create a piece of art that reflects nature’s beauty. With the right materials and a little patience, you’ll have a stunning centerpiece that adds warmth and character to your home. Happy woodworking!